Quickair
Quickair
A poor compressed air piping installation rarely announces itself on day one. It shows up months later — tools losing power at the end of a run, a compressor short-cycling because it can’t keep up with pressure recovery, or fittings weeping air after just a few months of use. Getting your modular compressed air piping installation right from the start is the difference between a system that runs reliably for twenty years and one that needs rework within three.
This guide walks through planning, installing, and testing a modular aluminium compressed air piping system correctly, step by step.
Every successful modular compressed air piping installation starts on paper, not with a pipe cutter. Map out:
A loop layout — where air can reach any point in the system from two directions — delivers significantly more effective capacity than a straight dead-end run at the same pipe diameter, and evens out pressure across the whole facility. For most new installations, this is worth the modest extra material cost.
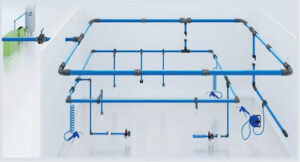
Aluminium modular pipe is now the standard choice for new compressed air piping installations, and for good reason. It uses push-to-connect fittings — no threading, no brazing, no welding — so a section of pipe cuts to length, the fitting clips onto the end, and the run is ready. Because aluminium doesn’t corrode internally, it won’t produce the rust particles or scale buildup that eventually restricts airflow in steel systems. We cover this comparison in more depth in our post on aluminium compressed air piping.
Before installation, confirm your pipe diameter is correct for your CFM demand and pressure requirements — this is the single most common point of failure in a compressed air piping installation. Undersized pipe increases velocity and pressure drop, and adds ongoing stress at joints that can accelerate leaks over time. Our air pipe sizing guide walks through exactly how to calculate this correctly before you order materials.
Compressors vibrate under load. Rigid pipe attached directly to the compressor outlet transmits that vibration into every joint and fitting down the line, accelerating wear. A short flexible connector at the outlet before transitioning to rigid modular pipe protects the rest of your installation.
For a modular aluminium system:
Avoid excessive use of elbows and unnecessary in-line reductions in your run; each one adds resistance and pressure drop to your compressed air piping installation.
All compressed air piping should be installed with a slight slope so condensate collects at designated low points rather than pooling randomly in the line. Fit drain points at these low spots to remove moisture before it reaches your tools and equipment.
Once your modular compressed air piping installation is complete, pressurize the system and hold it at operating pressure for at least 15 minutes before connecting any tools. No pressure drop during this window means no leaks. If pressure falls, use an ultrasonic leak detector to locate the source — our guide on compressed air leak detection covers this process in detail.
A well-planned modular compressed air piping installation pays for itself in reliability — fewer leaks, consistent pressure at every point of use, and a system that can grow with your facility instead of needing to be rebuilt. Getting the layout, sizing, and connections right before the first pipe is cut is what separates a system that lasts decades from one that causes problems within a year.
Quickair’s modular aluminium piping systems are designed for fast, leak-free installation with push-fit connections — no welding, no threading. Talk to our team about planning your next installation.
Welcome Back 👋
Sign in to access your account and continue where you left off.
Welcome aboard 🚀
Create your account to access everything you need.
Links
Contact Us